Examples#
To help gain a better understanding of the JupyterLab-Blockly, we created some examples you can easily access and experiment with. They can be accessed from the folder examples in the Github repository.
The examples give you a chance to be introduced to the most important blocks and their functionalities. The extension is a great tool for introducing the most relevant concepts of coding by also letting you see the rendered code. Once you have gotten a good grasp on it, you can easily use the familiar Jupyter enviroment to move to another classical programming language, such as Python.
Logic Blocks Example#
The example in logic.jpblockly takes a random integer and checks if it respects certain conditions, through a series of if-else statements, and returns appropiate messages.
NOTE : Any block that has the settings icon in the upper-left corner offers the possibility of adding extra fields, thus you can modify the if standard block to adapt to your code by adding the needed else if or else clauses.
Loop Blocks Example#
In loops.jpblockly, we use a standard loop with initial condition to iterate from 1 to 15 and print a message at each step and one to mark the exit from the loop.
In order to iterate through the loop, we created a variable count. You can create variables by simply accessing the Variables category from the toolbox and pressing the button Create variable…. Once you have named and created your variable, a new selection of blocks will appear for it in the category.
Texts and Lists Blocks Example#
In the text_and_lists.jpblockly example, we are using several of the offered blocks from the two categories, to modify or offer information from a string saved in the variable sentence.
Function and Color Blocks Example#
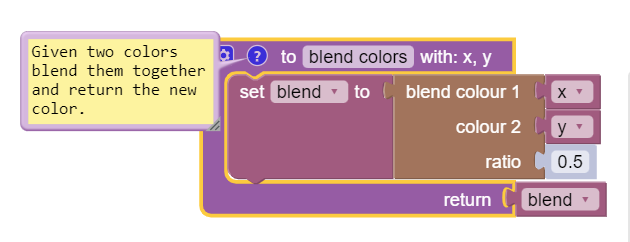
In functions.jpblockly, we are creating a function blend colors which takes two randomly chosen colors and returns a new color, formed by blending the inputs, using a color block.
When creating a function, you can choose a name for it, the number of inputs (by pressing the settings icon), whether it has an output or not and write a comment for it to explain its functionality (by pressing the question mark icon).
NOTE : You can add a comment to any icon by right clicking on it and choosing Add comment. The added text will appear in the generated code, above the selected block as a comment.